Monday, 29 December 2014

Sketchabilities Reveal #130~


After your turkey leftovers are gone, all the goodies have been eaten, and Holiday company have gone home....it's time to document all of those memories. What better way to kick start your holiday papercrafting than a great Sketch!
Today is the day to reveal Sketch #130 from Sketchabilities.
Here is my take on this fabulous sketch.


I created my layout using the Merry & Bright collection from Pink Paislee. Such pretty and classic colours and patterns for all of your holiday needs.


I spy some pretty May Arts Scalloped Red Ribbon and Natural Twine.


Then there is our crazy pooch, who looks like she's smiling in her photo with Santa.
She makes me giggle on a regular basis!


Thanks for stopping by to check out my take on Sketchabilities Reveal #130!

Monday, 15 December 2014

Sketchabilities Reveal #129~


It's time for yet another Sketchabilities Design Team reveal!
It's when we finally get to show you the fabulous sketch and all of the creations we've designed after being inspired by the sketch.
Here is my layout I created using Sketch #129.


I loved working with this sketch! Such great detail and inspiration.


I used the Find Your Wings and Fly collection from My Mind's Eye.


The flowers are from Petaloo and Prima.


I spy some Curtsey Boutique pretties as well. From the dyed doily, the polka dot embossed tag and the yellow baker's twine.
The "Love This" glitter sticker is from Heidi Swapp.


Thank you so much for stopping by to check out my creation inspired by the Sketchabilities #129 reveal.

Unique Gift Wrapping Ideas with May Arts Ribbon~


The May Arts Ribbon Ribbonistas, have been at it again.
We are blog hopping today to showcase some fun ways to use ribbon to dress up your holiday packages. I decided to dress up a few packages with the same theme
I love the simplicity of brown paper wrapped packages....you could say it's one of "My Favourite Things".
Brown paper packages, wrapped up with string....
Bright green string that is!


I used this fun red pom pom wired string to create a flower like bow on the top of my package, adding a fun large white button in the middle.
The parrot green burlap string was the perfectly fun contrast to the red.


I used the red scallop adhesive backed ribbon on the bottom of this small gift box.
I then added some scrapbook paper and stickers to the top of the box. Then used my circle punch and newsprint, and silver glitter to dress up the sides further.


My smallest package, is a simple little white topped jar that I picked up at my local dollarstore. I added another newsprint circle and silver glitter to the lid. I used the red scallop adhesive ribbon around the bottom of the lid. Fill with something pretty and your package is complete.


Thank you for stopping by to check out my take on Unique Gift Wrapping with May Arts Ribbon.
For more crafty inspiration Find and Follow me on Pinterest!

Thursday, 11 December 2014

Sweet Treats with May Arts Ribbon~


The May Arts Ribbon, Ribbonista's are together again for some more Holiday Inspiration!
This time around we are showing some Sweet Treat ideas using some oh so pretty May Arts Ribbon.


I have 2 little projects to show today. My first is a fun little way to add some treats to your holiday table. This little vintage tea cup was given to me by my beautiful mother in law, and I adore it. I thought it would be beautiful as a part of a holiday tablescape....holding treats for before, after or during your traditional meal. Add the sweet little monogrammed tag, and it also acts as a place card.


The mini white shipping tags and white glitter snowflakes are both from The Curtsey Boutique.


My second project is a great way to share a sweet and yummy homemade gift this holiday season. I wrapped a loaf, and loaf pan in a tea towel. Finished with this beautiful Red Herringbone Ribbon, Green Burlap String and a wooden spoon. I added another tag, like the one from my previous project and Taaaa Daaaa!


Thank you so much for stopping by to check out my Sweet Treat creations!

Tuesday, 2 December 2014

Shine~

This is a beautiful layout I created of a beautiful young woman, that we are so very proud of.
President of the student council, dancer, pianist, new driver and an all around good person!
I had a vision for this layout from the start, perfect pretty patterns and gold embellishments. These embellishments included 3 inch gold foil letters that matched the collection.
I had the layout almost complete with the exception of adding the gold foil monogram Z....then it happened....a crafting meltdown. Well not quite, but the friends around me cropping can attest...I had a moment when I found out that these beautiful gold letters did not include the letter Z.
What?
It bothered me, even after completing the layout in a different way than planned. So I did write the company, inquiring about the lack of Z's. Turns out, it was a flaw in their first round of printing, they missed the Z's in the editing process. All batches after that do have the Z's. They were kind enough to send me a package of the same letters complete with Z's.
Thank you Pebbles Inc.

So, on with the show!
Here is my layout, without the Z.


I created this layout using patterned papers and embellishments from the HomeMade collection from Pebbles Inc.


I spy some super cute glitter star embellishments, mini white shipping tags and baker's twine from the Curtsey Boutique.


Thanks so much for listening to my crafty story and checking out my scrappy creation!

Saturday, 29 November 2014

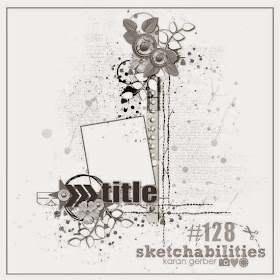
Sketchabilities Reveal #128~


It's Reveal Day again at Sketchabilities!
We are ready to inspire and get you crafting as we head into this busy holiday season.
I chose to look back at summer for my layout.


Take a really close look at this beautiful sketch! There are so many little details to inspire you.


I chose to work with patterned papers and embellishments from the Gramercy Road collection from Gossamer Blue. This is a kit that I got through Scrap Shotz, and I loved working with it.


Thank you so much for stopping by to check out my Sketchabilities Reveal. Be sure to check out what the rest of the design team came up with, with the same sketch.

Friday, 28 November 2014

Homemade with Hints of Gold~

Today I am sharing my second layout that I created at the Gadget Girls Mega Crop in October. I was so busy that weekend that I only finished 2 layouts.

I created this layout using another Scrap Shotz kit, this one featuring the Homemade collection from Pebbles Inc. I LOVE sparkle and shine, these gold accents are fabulous!


When I saw this collection I knew right away that I would like to use it with an older photo, one from our engagement photo shoot with our brass instruments. That bit of golden sparkle is the perfect accent for the photo.


I did add some Prima flowers from my own collection.


Thanks so much for stopping by!

Monday, 24 November 2014

I Love This One~

Just a pretty little layout to brighten your day!
Even when she's relaxed she's beautiful, inside and out!
I wanted to create an elegant layout filled with texture and warmth.


My layout was created using the Gramercy Road collection from Gossamer Blue.
Some Prima flowers, metal key & keyhole, and pretty textured ribbon and rosettes...made perfect embellishments.


The dyed paper doily and baker's twine are from the Curtsey Boutique.


Thanks for stopping by!

Thursday, 20 November 2014

May Arts Ribbon: Kid's Crafting Blog Hop~

Today I am teaming up with the rest of the Ribbonistas from May Arts Ribbon to create and inspire. We are sharing ideas for crafting with your kids for the holidays.
I had so much fun creating this fun little project, that I think I am a kid at heart for sure!


So today I am sharing my Wooden Spoon Christmas Tree.


Project Recipe:
Wooden Spoon
May Arts Ribbon:
Gold Glitter
Yellow Button
Hot Glue


I picked up my wooden spoon at my local dollarstore. I chose the spoon that already had the hole drilled in the top of the handle. This just makes it so much easier to hang.


I painted my spoon with DecoArt's Dazzling Gold Paint. I then used Deco Page adhesive to paint a portion of the bottom of the spoon, then quickly added my gold glitter.

Adding the ribbon is fun and super easy. I just cut tons of pieces of different coordinating ribbon and string and then made my way up the handle of the spoon. It's simply tying knots over and over again. You can trim the ribbon afterwards to create the tree shape.
The last thing I added was my star at the top, and a button in the middle.


Thank you so much for stopping by to check out all of our creations! I hope we've inspired you to get crafty with your family over this holiday season.