Tuesday, 30 September 2014

Sketchabilities Reveal #124~


It is time for another Sketchabilities Design Team Reveal!
Sketch #124 is a fun one with so many little details. Be sure to stop by and check out all of the other creations based on this fabulous sketch.


I chose to work with the Harmony Collection from Authentique.


I love the feminine floral theme of the Authentique patterned papers and embellishments. They worked perfectly with my musical themed layout.


Thank you so much for stopping by and I hope to see some of you take the sketch challenge this time around at Sketchabilities!

Monday, 29 September 2014

Higher Than The Sky: Mixed Media Canvas Tutorial~

As some of you may already know, I am a Blogger Contributor at DecoArt. They have been making fabulous art supplies since 1985!
They have just recently released their new Media Collection, products that are formulated to work seamlessly together to create amazing mixed media art. I was asked to demo these fabulous products at the upcoming Gadget Girls Fall Mega Crop in October. So, I have been getting messy and creating.

So today, I am showcasing my first piece of mixed media art that I created using the Media Collection from DecoArt.


The Media Collection includes a multitude of products for all of your mixed media needs.

Project Recipe:


Instead of using a traditional canvas I started with 2 cork tiles that I hot glued together for additional thickness. I love the texture of cork.
At this point I also added some marks on the cork that reference the photo that I used, you can faintly see the marks I made in the photo below.


I used White Gesso to coat the entire front surface of the cork.
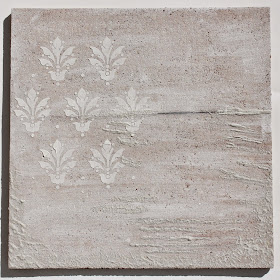
I also used Modelling Paste and the Southern Motif Stencil in the upper left hand corner of the tile.
Also in the above photo if you look closely you will see where I added some additional texture using the Sand Texture Paste. It adds great dimension and that great sandy texture.


My next step was to add colour using the Media Collection paints. I did a little mixing of colours with some of the DecoArt Multi-Surface paints to get the tones that I wanted.
I masked the bottom portion of the canvas and Gold Shimmer Misted the sky to add a little sparkle.
I also added another layer of the Sand Texture Paste.
While this was all still wet, I also added some chunky glass glitter. I wanted to add some sparkle to the water and sand. You can see that a little clearer in the photo below.


Probably what I found the hardest to do was wait for each layer to dry enough to keep working. I used my heat gun at times to speed things up, but other times I just had to be patient.


I inked the top portion of the canvas using my regular brown ink to pick up a bit of that Modelling Paste, stencil motif.
I also added a layer of glaze over the water portion of the canvas to add a great shine.


To add colour to my cheesecloth, I simply used all of the leftover paints on my palette. I then did a quick dip into a Taupe Liquid Rit dye bath. That got rid of any remaining stark white.
Let dry completely.


Here is the finished product, fully embellished and with my photo.
Using a hot glue gun, I added the knotted cheesecloth and shells.


I love how the Sand Texture Paste over the glazed paint looks like foam on the water. A mixture of the Burnt Umber, Titanium White and Primary Magenta paints made for the perfect PEI sand colour.
Another fabulous finishing touch was the May Arts Burlap Ribbon around the outside of my cork tiles, I think it really pulled the entire seaside theme together.


I used lots of different letter stickers to create the quote on my canvas, but they were NOT the correct colour to begin with. I covered the letters in gesso, then added colour when needed, and on the word SKY, I added the Sand Texture Paste.
I love how it turned out.
I used Liquid Glass to adhere the letters and words to the canvas.


Thank you so much for stopping by to check out my Mixed Media Canvas Tutorial with the DecoArt Media Collection.

Friday, 26 September 2014

May Arts. Authentique. Imagine Crafts~


The Ribbonistas of May Arts Ribbon were asked to participate in a creative blog hop with Authentique and Imagine Crafts/Tsukineko, and we were more than happy to participate!
We were sent some beautiful products from both companies to work with. 
I created my project using the Harmony collection from Authentique. I loved working with this stunning vintage floral collection.


I inked my entire project using Toffee Crunch MementoLuxe ink from Imagine Crafts/Tsukineko.


I started with glitzing up my paper doily. I chose Gold irResistible dimensional spray from Imagine Crafts. Not only did it give me the shine I wanted, to coordinate with the pretty gold May Arts ribbon I chose to use. But it also adds texture and dimension.


I added a few Authentique stickers and embellishments, as well as some buttons and golden pearls.
The oh so pretty Gold Compass, Nautical Cutout Ribbon was a perfect splash of shine.


Thanks for stopping my to check out my creation for the May Arts Ribbon, Authentique and Imagine Crafts creative blog hop.


For more crafty inspiration find and follow me on Pinterest.

Thursday, 25 September 2014

Megan's Bridal Shower: The Details~

One afternoon I got an email from one of Megan's other bridesmaids regarding her upcoming shower. She wanted it to be a Garden Party theme, and it was going to be held at a french patisserie in Halifax. She asked if I could make up an invitation in that theme to be photographed and emailed to the attendees.
This invite was the start of what I came up with for decor for the shower and the Thank You gifts for the attendees.


I used some pretty patterned papers that I have had in my stash for, dare I say....years. Just waiting for  an occasion pretty enough to use.
I added some gold ribbon from May Arts for a little sparkle.
The hand dyed doily, metal key and the baker's twine are all from the Curtsey Boutique.


Some of the other decor included my garden party place setting created from a wooden spool and skewer. I also made Megan a brooch to wear for the afternoon. A little sparkle, lots of ribbon and some roses fit the theme nicely.


Each small bistro table had a different vintage tea cup and saucer set with flowers from my mother's garden in them. They looked gorgeous and smelled fantastic.


As a part of each guests Thank You gift, I created little envelopes of wildflower and lavender seeds.
For a complete tutorial, head on over to the Curtsey Boutique blog.


Thanks for stopping by to check out the details from my NOW sister-in-law's Garden Party bridal shower.

Tuesday, 23 September 2014

15 Minute Halloween Kids Craft: Bat Terrarium~


It's that time again! Another instalment of Craft Lightning with The Country Chic Cottage and 30 Minute Crafts.
All of the Craft Lightning Halloween Kids Crafts are ones that could be completed in about 15 minutes.
The project that I am sharing is a Bat Terrarium created using an old jar and some crafty bits you probably have laying around your home.

Your first step is to collect your terrarium bits from around your yard or property. Little rocks, sticks, sea glass, anything you desire.


I then took a few strips of cheesecloth and roughed them up a bit, and made them into a little mound. 
I used Radiant Neon purple ink by Tsukineko and irRESISTible dimensional spray by Imagine Crafts to add some colour to the cheesecloth.


 You can print out, punch out or use a die cut to create your bats. I attached each bat to a piece of silver thread.
Then I attached the bats to the lid of the jar using hot glue.


I used DecoArt Gesso to cover my little metal key. To further decorate the lid of my jar I added May Arts Ribbon and Raffia.


Thank you so much for stopping by and another thank you to The Country Chic Cottage and 30 Minute Crafts for including once again in this Craft Lightning!

Dyed Clothespin Tutorial with Rit Dyes~

Today I'm sharing a quick Rit Dyes Tutorial.
This is a project that I did as a part of Tom and Megan's wedding decor. Megan's wedding colour was purple, so I incorporated it into the decor as much as I could.


To get the nice deep purple colour, I used Fuchsia and Aquamarine liquid Rit Dyes. I mixed the dyes 2 parts warm water and 1 part dyes. To get the colour you are looking for, just keep doing dip tests with a piece of paper towel to see what the colour will look like.

I left the clothespins in the dye bath for a good 30 minutes. I really wanted a saturated tone.

Then (using rubber gloves) take out the clothespins and let dry completely.
I personally don't mind a bit of a mess so....not thinking I dove right in with my bare hands. This left me with purple fingertips for a few days.


The purple clothespins looked fantastic on the old wood door.
They held photos and the table seating charts.


Thanks for stopping by to check out my Dyed Clothespin Tutorial!